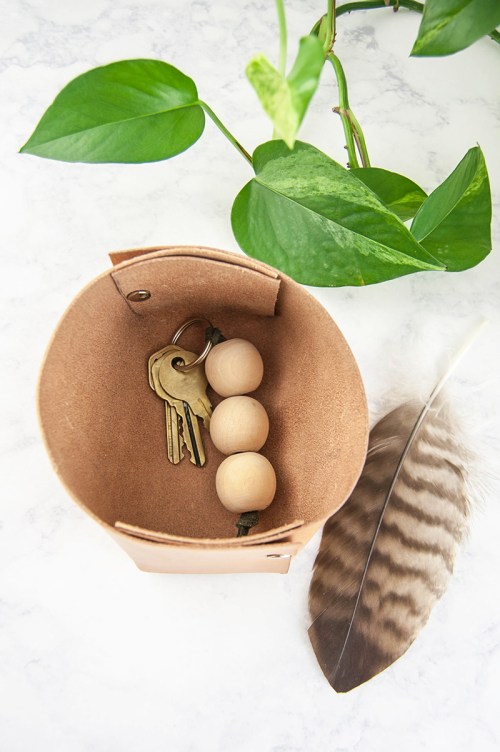
Dress up your storage with this DIY leather catchall. I’m not sure whether to call it a bin, basket, or bowl, but it’s as versatile as it is difficult to define. You can use it as a modern bowl for your keys and change, or to help organize a drawer or shelf.

I even made templates for three different sizes, so you can choose the most useful size for you.


I made my catchalls with discarded leather pieces from SCRAP, but I was also considering trying to use faux leather or felt for this project. Would you guys be interested in a follow-up with either of those materials?

Sometimes when I develop tutorials I struggle with whether or not to use craft tools that I own, but that I realize most people probably don’t have. So I’ll use them, but try to figure out alternatives to suggest if you don’t have the tool and can’t/don’t want to buy it. In this case it was the leather hole punch that caused this dilemma. I’ve had one for years, and I’ve used it for everything from adding holes to a belt, to making liquor bottle labels, keychains, and earrings. But I know that most people don’t have one. So I tested some options, and while the punch is the easiest, you can definitely use a drill or X-acto knife to make the holes instead. With a sturdy needle and waxed thread, I bet you could even skip the rivets altogether if you wanted to. But let’s not complicate this–here’s how I made this version.
DIY Leather Catchall Organizer Bin
Materials
Vegetable tanned leather – Size depends on the bin. 5 1/2″ x 7″ (14 x 17 cm) for the small, 6 1/4″ x 8″ (16 x 20 cm) for the medium, and 7″ x 9″ (18 x 22 1/2 cm) for the large
Rivets – I used the ones that came with this kit.
Template – Small, medium, or large
Small piece of scrap wood
Tools
Rivet setter – I used this kit.
Leather hole punch, electric drill, or X-acto knife
Ruler
Scissors
Hammer
Pencil
Binder clips (optional)
Steps
1. Cut out the template, including the slits. Place the template on the back side of the leather, and trace around it. Fold the flaps so that you can trace the lines for the center slits.


2. Cut the shape out of the leather, including the slits for the flaps that will make up the ends.

3. Punch or cut the marked holes through the outer layer of leather. You can use a leather punch if you have one, but an electric drill also works. Or use an X-acto knife to cut a very small X, just big enough for a rivet post to fit through.

4. Fold up the center flap, fold the right flap across it, then fold the left flap across both. Clip the flaps in place with a binder clip, then use the pencil to mark the leather beneath it for the next hole.


5. Punch or cut the hole you just marked through the next two layers of leather. Repeat the last three steps on the other end of the bin. Here’s what the holes look like if you unfold one end of the bin:

6. Put a rivet through the set of three holes on one end of the bin, and hammer it in place. Repeat on the other end.


The finished sizes of the bins are as follows:
Large: 4 1/2″ x 3 1/2″ (9 x 11 cm)
Medium: 3 3/4″ x 3 1/2″ (9 x 8 1/2 cm)
Small: 3 1/4″ x 3″ (8 x 7 1/2 cm)


Great idea! Maybe I make some myself for organising my craft supplies:-) I inherited a 50 years old hole punch from my mother, still working good and I use it for a lot of things. If you are a crafter you should have one, it can be used for so many things!!!
Kali, I agree, they are really useful! Lucky for you, your mom sounds like she must have been a crafty lady, too. I bet your punch is even better than the ones you can buy today, so I hope it keeps getting passed down the generations in your family. Maybe it’ll be a family heirloom 🙂
They are so cute. We have a place here in Pittsburgh, PA that seems very similar to Scrap. The one here is called The Center for Creative Reuse. It is located next to Construction Junction our local donate and recycle store for vintage and surplus building and decor items. I love Portland and hope to visit again soon. Thanks for all of your fabulous ideas.
Maureen
Thanks Maureen! Those places sound great, if I ever get out to Pittsburgh I’ll have to visit. I’m so glad that you have those kind of resources, because re-using is one of the best way to find supplies.
Hope you get out to Portland again soon 🙂