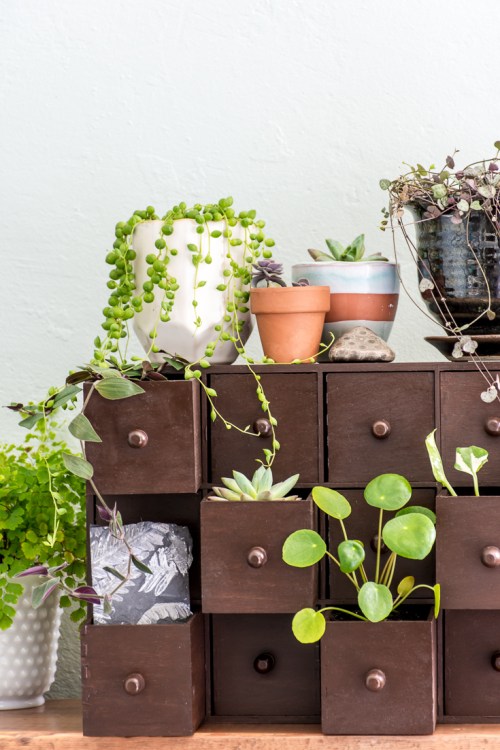
As I mentioned when I posted inspiration for these plant drawers, I can’t seem to find an inexpensive set of vintage apothecary/card catalog drawers of my own. So I decided to get the look with an Ikea hack of their mini drawers.


Years ago, Ikea carried drawers like these, but deeper. I still have a couple of sets that I bought before they disappeared from US stores. So a couple of months ago, when I saw the Moppe unit I used for these plant drawers, I bought them even though I didn’t know what I was going to do with them. I was afraid it would be my only chance, and that they would disappear again!

The particular Moppe drawers I used aren’t on the US Ikea site, so I’m not sure if they’re still available. (When I was searching for them, I did come across this super cute little drawer unit, which is already finished, and has sweet little label pulls, so it’s an option if you want a shortcut.)


DIY Plant Drawers
Materials
Ikea Moppe with 12 drawers – The piece I used isn’t currently on the US Ikea site.
Screws – I used 12 size #6 3/4″ wood screws.
Plastic wall anchors – They should be smooth plastic conical ones for #6 to #8 3/4″ screws, similar to these.
Small wood finials – I used two packets of these from Michaels.
Glue – I used E6000.
Wood stain – I used this stain.
Wood sealer – I used this spray sealer.
Tools
Ruler or measuring tape
Drill
1/8″ drill bit
Manual screwdriver
Pencil
Rags or stain brush
Disposable gloves
Scissors
X-acto knife

Steps
1. In order to make the drawers look more like their inspiration, I flipped them around to the side without a notch. This is the side I’ll be adding pulls to. You could probably glue pulls to the drawers with wood glue and clamps, but I wanted to make them removable, in case I ever wanted to flip the drawers back around, so I’ll show you how I added my pulls.

2. I couldn’t find wood pulls small enough for my drawers, so I improvised with these little wood finials. I have no idea what they’re actually supposed to be used for, but they worked perfectly as drawer pulls with a bit of modification. The holes on the back are rather large, too big for the screws I had, so I added some plastic wall anchors to hold them in place. But the wall anchors are too long, so first glue them in place. Put glue on the ends, then press them in as far as they’ll go into the finial, and let the glue dry.


3. After the glue has dried, cut off the excess plastic anchor with scissors, and then an X-acto knife, to get them flush with the wood. If you get any glue on the fronts of the finials, be sure to clean it up before it dries, because it will block wood stain from penetrating the wood. (I also stained the pulls after the glue dried, but I’d actually recommend attaching them to the drawers first.)


4. Measure and mark the centers of the drawers, then drill holes.


5. Screw the pulls to the drawers. Because of the size of the drawer, you most likely won’t be able to use a power screwdriver, and will need to use a manual one that fits through the tab on the back (formerly front) of the drawer.

6. Stain the drawers, and then seal them with an outdoor sealer. I know I show them stained before attaching the pulls, but it would have been easier to stain the pulls with them attached to the drawers. Staining these takes a while because of all of the different surfaces, and it’s pretty messy, so be prepared, and wear gloves.
Add plants!


I just ran across little shelves like this and wanted to do a diy but didn’t end up buying it and now I’m kicking myself because yours is AMAZING! Looooove it! 🙂
Oh no, I hate when that happens! Maybe you can go back? I hope so. Thank you!
Your DIY plant drawers are lovely. You did a wonderful job, I really like it. Amazing post, thanks for sharing this.