Sunglasses are one of those accessories that are easy to accumulate, but tricky to store. You’re less likely to forget them if you can see them, yet you don’t want them to turn into clutter. So I built this simple sunglasses organizer display shelf. Since it uses wall space, it’s great for a small entryway or bedroom. It was super inexpensive and easy to build, and it turned potential clutter into a display. Get those sunglasses out of the drawer, and build this DIY sunglasses organizer to get ready for sunny days ahead!

Confession: I have a bunch of pairs of sunglasses, but I pretty much wear the same pair all the time. The real reason I made this sunglasses organizer is that my husband keeps his sunglasses by the front door, and we both thought they’d look better displayed on a shelf. Even if you don’t have multiple pairs of sunglasses, you could use this shelf to display other collections or accessories. Ooh, and you could add a couple of hooks to the bottom for storing your keys! Though it’s unstained in these photos, I think I’m going to end up staining my sunglasses organizer. The light wood looks good on the white walls, but my entryway has dark walls, so I’ll stain it a darker color. Seeing it in these photos kind of makes me wish I was keeping it light. I think it’ll look pretty both ways, though.

I hung this with a keyhole hanger, but Ctrl+Curate made a similar one out of plywood, and hung it with removable Command strips. So if you can’t make holes in your walls, this is still a renter-friendly way to organize your sunglasses!
Sunglasses Organizer Shelf
Materials
0.5 x 5.5 x 36-inch poplar board
#6 1 5/8-inch screws
Sandpaper
Tools
Chop saw/miter saw
Measuring tape
Ruler/straightedge
Pencil
Screwdriver
Drillbit
Clamps
Optional: Keyhole hanger, 3/8-inch screws, and 7/8-inch Forstner drill bit. (I used a bit from this handy set.)

(Glue is shown but I didn’t end up using it.)
Steps
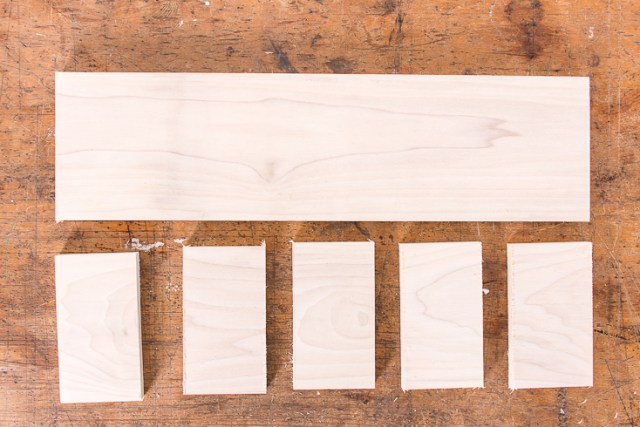
1. Cut five 3-inch pieces for the shelves. You could make them slightly larger or smaller, but this is the size I went with.

2. Starting from what will be the bottom of the organizer, mark the remaining piece of wood (about 21 inches) for five evenly-spaced shelves.

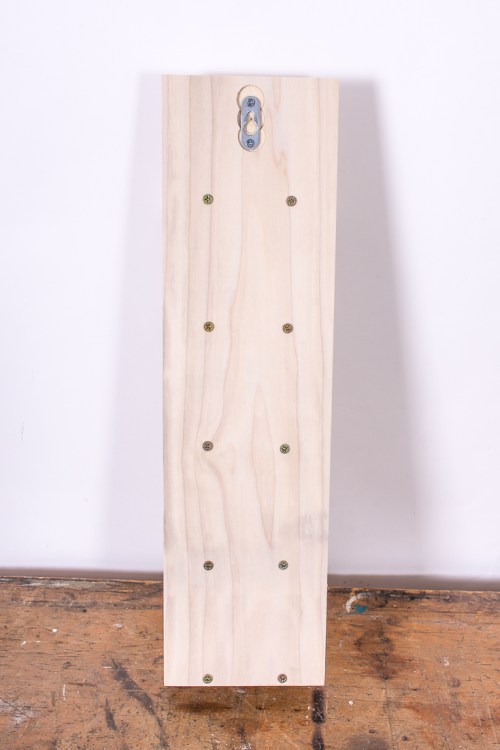
3. Drill two holes at each line for attaching the shelves. My holes are drilled 1/4-inch above the lines to take into account the thickness of the wood shelves.

4. Optional: If you want your sunglasses organizer to hang flush on the wall, you can use a keyhole hanger. You could also skip this and hang it with picture hanger, or even Command hooks. On the back, measure to the center about half an inch from the top of the backing board. Trace around the keyhole hanger, then use a 7/8-inch Forstner bit to drill the location for the hanger. Attach it with 3/8-inch screws.


5. Sand the pieces. I used 180 and 220 grit sandpaper.

6. If you want you can seal and stain your organizer. Let it dry completely before assembling it.
7. Assemble your sunglasses organizer. Line up the shelves with the holes, clamp them in place, and drill through the holes into the shelf. Then attach the shelves with two #6 1 5/8-inch screws each. You could add glue before you screw your shelves in, and I had planned on it, but I realized I really didn’t need it.


8. Hang it up, and add your sunglasses!


I put mine in a vintage, fabric closepin holder! It works well, I like how streamlined yours is.
Paige, that sounds cute! Use what ya got 🙂
Thank you!
I love your take Rachel! I definitely need to get a Forstner bit. Do you like the Ryobi ones?
Thank you! The Ryobi bits came in a set with a bunch of sizes, and they’re super useful! I’ve used them for tons of projects, and would totally recommend them.