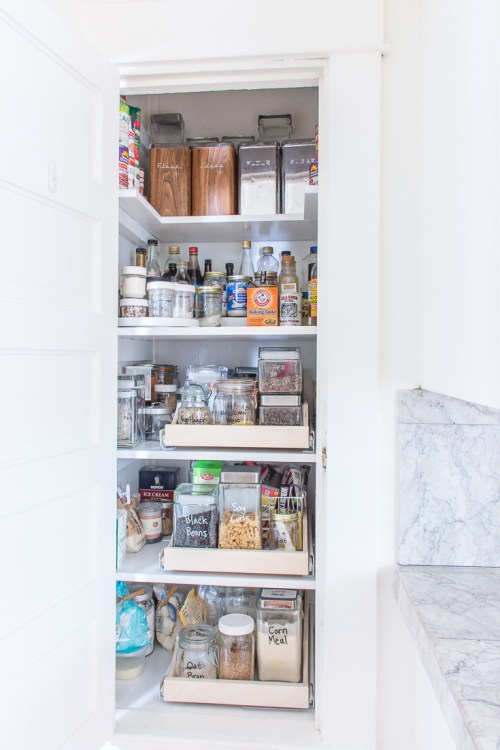
Last I left off with my pantry makeover, I had finished the laundry chute re-routing that I got majorly sidetracked by, but the pantry itself was still in limbo. I’ve finished it now, though, and I can’t believe how much of an improvement it is!
(It feels kind of weirdly revealing to show off the contents of my pantry to the whole internet, but here we go.)

Now instead of using like, a third of the space, I’m using all of it! And maybe it’s partly because I went from having the contents of my pantry dumped all over my counter for weeks while I worked on this, but I think it makes cooking and baking much easier.

Step 1: Tear everything out. I tend to do demo in my pajamas, with no safety gear. Don’t do that.
Step 2: Build shelves. Each shelf is built out of two pieces of 1×12, which are set on top of supports attached to the wall at either side. I reused the existing supports on the left, and screwed 2x2s into studs on the right as supports. To make sure the shelves fit properly, I put them all in, then took them out for painting. (Delicious helped with this step.)

Step 3: Paint everything. After patching lots of holes, I washed off tons of dust and dirt, then primed the interior. Then I painted it with Ace Hardware’s Cabinet Paint in the off-the-shelf color “High Hiding White.” I did the same with the shelves. This paint takes a long time to dry and cure, but it’s nice and bright, and seems like a sturdy finish.
Step 4: Add drawers. I used three of these cabinet pull-out drawers, and I very much recommend them. I actually put the same ones in some of my kitchen base cabinets a couple of years ago, and they’ve been great. They’re really easy to install, too, with just 4 screws per drawer. For this pantry, I installed the bottom one before putting any of the shelves in, added the shelf above it, installed the next drawer, and did the same for the next. Doing it that way gave me more room to maneuver, but it would’ve been possible to do it with the shelves already installed, if I had needed to.
Other Pantry Tips
- Containers: In my quest to cut down on random food packaging, and because I buy a lot of stuff in bulk, I’ve been stockpiling glass canisters for a while now. Square ones are the most space-efficient, and I like these because they’re stackable, although I think I like the version with aluminum lids better because they’re lighter. The only downsides are that 1 cup measuring cups don’t fit in the jar mouth, and replacing every container I need would be expensive. Luckily I have found a bunch at thrift stores. Most of them have the heavier glass lids, but I can deal with that. Also, because this is the real world and not Pinterest pantry porn, I have a bunch of random containers that don’t match. If you’re using Mason jars for storage, not canning, plastic screw-on lids work really well.

- Labels: Figuring out how to label glass jars has been a years-long quest! I just realized that I’m not even joking. I’ve tried chalk, dry erase pens, dry erase labels, permanent markers, grease pencils, and printable labels. I swear I’m not an insane person obsessed with labeling jars, I’ve just experimented with a lot of solutions over the years. I think I’ve finally hit on a winner, though. This time, I labelled my glass canisters with Sharpie paint pens, either in black or in white, depending on the color of the jar contents. So far it doesn’t rub off when I touch it, but it’s easy to get off with soap and water when I do want to change it. Plus, even though I’m not one of those people with freakishly-perfect handwriting that looks like a font, the labels still look pretty nice.

- Lighting: There isn’t any wired lighting in here, and someday we’ll pay an electrician to come out and add lights everywhere we need them, but the meantime, I need light! That’s where this brilliant rechargeable LED light strip comes in handy. It detects motion, and I have it positioned so that it goes on when I open the door. So far it’s a really great solution.

- Other organizers: I have a couple of these tiered organizers for the small bottles and jars on the shelf second-from-the-top, and a lazy Susan turntable in front of that. They both help make the most of a deep shelf. Steven thought I should make that shelf U-shaped, like the one above it, and he’s been known to be right on occasion, but I thought I’d try these solutions first. (Then I’ll try to pretend it’s my own idea when I take the shelf out and make it U-shaped.)


