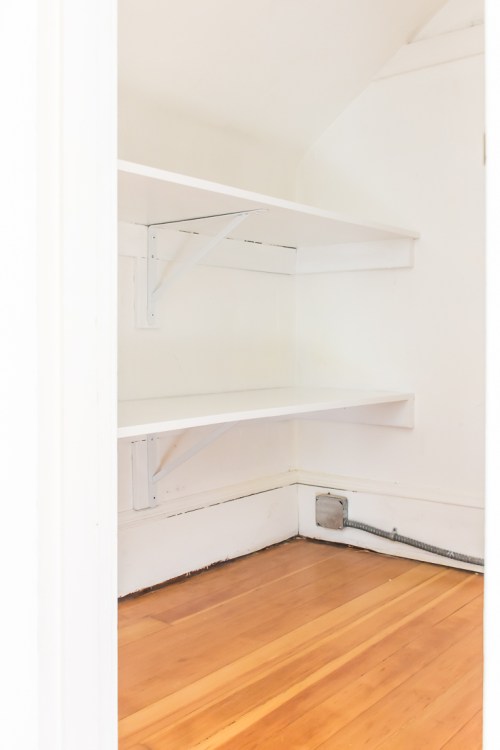
This weekend I built some shelves for a closet that desperately needed them, and while I would categorize this as a not-particularly-photogenic project, it is super practical and I’m really glad I did it! So I’m sharing the details in case you need a little push to get organized by building your own DIY wood storage shelves.

When I was trying to come up with a title for this blog post, I realized I had no idea what to call this closet. It’s a storage closet at the top of the stairs to our second floor, in a room we also don’t really have a name for. It’s quite spacious, but it was just totally open. So while it worked at first to just toss random stuff in it, accessing the stuff kind of started to be a problem. The pile of stuff needed some organization. Here’s the before:

Full disclosure: There were actually a few more things shoved in there that I moved out of the way before I took this photo. Suitcases and bags, our in-window air conditioner, old curtain rods, boxes, a tray, and a giant inside-joke rummage sale stuffed elephant are among the treasures we keep in this closet. Some purging and organizing was definitely needed here.
The fancy solution would be to go to an organizer store and get all up in their closet organization products. But for me there was a much cheaper, more eco-friendly, DIY solution at hand. When we first moved into our house, the below photo is what my bedroom closet looked like. (Ewwww. That’s the only photo I have of it in that state, because tearing out that carpet and repainting was one of my very first house projects. It looks like this now.) See those doors on the far left? There was a matching pair on the far right that you can’t see in this photo. When I painted the bedroom closet, I took all four doors and stuck them in the back of this other closet I’m fixing up now.

When I was trying to figure out how to clean up this closet, I realized that I should build some shelves, and that the perfect material for them was right in front of me. The closet doors were made of long pieces of 3/4-inch-thick painted plywood, which would make great utility shelves. So I took everything out of this closet, measured the length, and cut two of the doors to size with my circular saw. I cut four pieces of scrap 2×4 to hold up the ends, and attached them to the wall with nails. (I was again reminded of how non-square the walls are in this old house.)

This is also the point at which I remembered that I had lost my studfinder, so I had to resort to measuring and drilling little holes in the walls until I found the studs. This studfinder arrived right before I finished this project, and I realized it is so much better than my old one that I am kind of happy I lost it.
After I had done a coat of primer, I decided I needed to reinforce the shelves further in case I decided to put heavy stuff on them someday. So I added a support piece along the back, and these heavy-duty brackets. I used 1x4s for the back support pieces because I had some in my garage, but you could make all of your supports out of 2x4s, or 1x2s.

Ideally you’d paint and then add the brackets, but this paint has a really long dry time (6-8 hours) and re-coat time (24 hours), so I put the brackets up and painted around them. This white Ace cabinet paint was left over from painting my pantry shelves, and I like it, but it does slow things down.


Some sturdy bins from HomeGoods were a perfect fit, and now we have a ton more storage! I need to add some pegs and hooks to the wall (I’m thinking of using these), and I’ll put one of these rechargeable LED lights over the door until we someday have an electrician add a wired one. Judging by the junction boxes along the floor, I feel like maybe I could do this myself, but I’m not ready to open that can of worms quite yet.

We don’t have any actual proper linen closets in the house–currently all of our sheets and towels are stuffed in a big cabinet in the bathroom on the main floor, and we have some other random linens in a closet in the bedroom I use as my office. I’m really looking forward to having a spot for sheets near our bedroom on the second floor, though.
The only thing I bought for this project were the brackets and screws, but even if you had to buy wood for the shelves and supports, this would still be a really economical way to add sturdy built-in DIY wood storage shelves to a closet. This is why I have trouble throwing stuff away, because even if I can’t think of a use right away, I know that someday I will!
What You Need to Build Your Own DIY Wood Storage Shelves
Materials:
3/4-inch plywood for the shelves
2x4s or 1x2s for supports
Shelf brackets
Screws
Nails
Spackle
Primer
Paint
Tools:
Circular saw (or have the plywood cut at the store)
Miter saw
Hammer
Studfinder
Drill/screwdriver
Paintbrush
Sandpaper
Additional accessories:
Shaker pegs
Rechargeable LED light
Similar bins


I just re-did a closet and added the same lights. They are so nice and bright. Your closet looks great. Love your blog. Thank you.
Thanks so much, Priscilla! I’m so glad I found those lights, because they really make a huge difference in unlit closets. Really happy you like them, too!