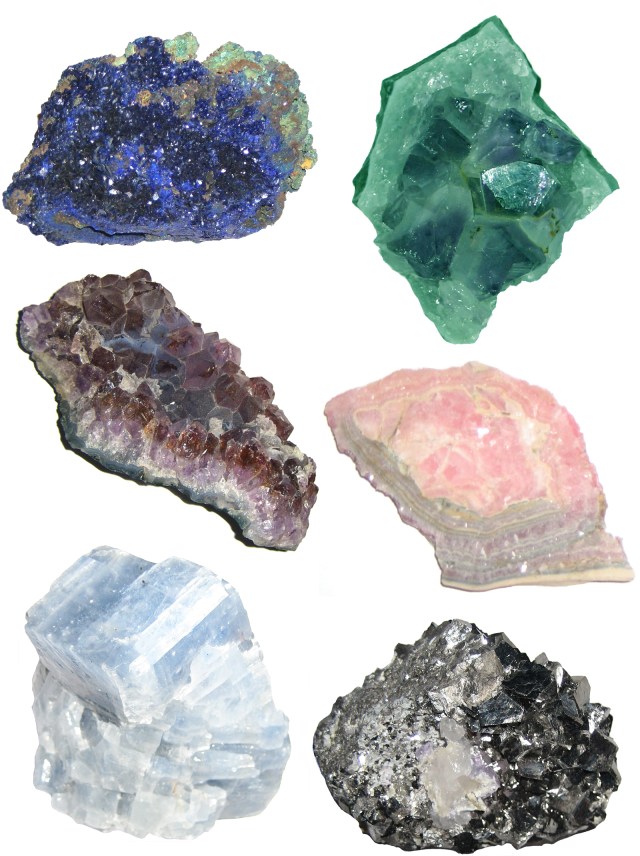
As I’ve proven time and again, gemstones and minerals are one of my big weaknesses (see my agate slice vase, crystal curtain tiebacks, crystal wall art, crystal point necklace, crystal earrings, and geode jewelry box for proof). It’s fitting that just yesterday I posted about another rock, marble. Maybe I was a geologist or a miner in a past life. And though I probably have enough tote bags to last for the rest of this life, I couldn’t resist making another one, in the style of a vintage mineral chart.
 Though I didn’t include the names of the minerals in the print-outs, I can identify them all. Clockwise from top left, the minerals are: Calcite, pyrite, rhodochrosite, azurite, fake emerald (amythyst that I turned green), and amethyst. Yeah, I cheated a little bit with the emerald, but I couldn’t find a good image of the raw gemstone.

In the last few years I’ve really gotten into the habit of bringing reusable tote bags to the grocery store, so much so that when I forget mine, it feels weird to use a paper bag. But I definitely find myself reaching for the cute ones more often than the utilitarian ones, so if this gem and mineral tote bag encourages anyone to bring a reusable bag more often, I consider my eco duty done.
DIY Mineral Chart Tote Bag
Materials
Canvas tote bag
Printable iron-on sheets for light fabric
Printable gemstones and minerals

These are all modified from photos that were all taken by Stephanie Clifford, and licensed under Creative Commons. The originals are available here.
Tools
Iron
Scissors
Ironing surface such as cardboard, wood, or tile
Steps
1. Pre-wash and dry your tote bag. Iron out any wrinkles with a dry iron without steam.
2. Print out the gemstones on the inkjet iron-on paper. Let the ink dry for a few minutes. You might want to do a test print on regular paper before you print on the inkjet paper.

3. Cut out the gems, rounding the edges and leaving a thin white border around the stones.

4. Arrange the cut out minerals on the bag as you want them to appear, keeping in mind that they will be reversed/mirrored.

After you’ve arranged them to your liking, flip the images over so the printed side is down.

5. Iron the minerals onto the tote bag, following the instructions on the packaging. The directions on mine emphasized that the more pressure you apply, the better your results will be, and that it’s better not to use an ironing board. So I did my ironing on my basement floor, with a piece of cardboard on the floor and a piece of tile right under the area I was ironing. I pressed down on the iron as hard as I could for 20 seconds at a time.

6. After the transfer has cooled, peel the backing off.


I was surprised at how crisp and bright my images turned out! The only slight change I would make if I was doing this again would be to shift the rocks upwards about an inch, so that they’re further from the bottom.

Don’t need any more totes? I’m thinking these would look cool on a t-shirt or throw pillow, but I haven’t tried either yet.


Hi Rachel, this bag is adorable. I love the idea of putting them on a t-shirt or pillow. I’ve never tried these iron on transfer sheets before but I think I’ll have to now I’ve seen your mineral bag.
p.s. I love your geode jewellery box as well 🙂
Emma, thanks so much! Iron-on sheets open up tons of crafty possibilities, don’t they? I’m already dreaming up my next project for mine. And watch out, my rock/mineral obsession might be contagious 🙂